


How Can I Mint My Own NFT? A Complete 2025 Guide
%201.svg)
%201.svg)
In recent years, the explosion of non-fungible tokens (NFTs) has revolutionized the way digital creators monetize and establish ownership of their work. Whether you are a digital artist, musician, entrepreneur, or simply curious about blockchain technology, understanding how can I mint my own NFT is essential to participate in this vibrant digital economy. Minting your own NFT means transforming your digital files—be it art, music, or collectibles—into unique digital assets secured by blockchain technology. This comprehensive 2025 guide will walk you through every step of the minting process, from concept creation to selling your NFT on a marketplace, ensuring you grasp both the technical and strategic aspects of creating NFTs.
Understanding NFT Minting: What It Actually Means
Minting an NFT is the process of creating a unique token on a blockchain that represents ownership of a specific digital asset. When you mint an NFT, you convert your digital content—such as an image, music track, video, or collectible—into a unique token recorded on the blockchain. This token acts as a verifiable certificate of authenticity and ownership that cannot be altered or duplicated.
Think of minting as digitally striking a limited-edition coin or printing a certificate of authenticity for your digital content. The blockchain acts as a permanent ledger, logging your NFT’s metadata, ownership details, and any royalty agreements you assign for future sales. This process uses smart contracts—self-executing contracts on the blockchain—that define the NFT’s unique characteristics and govern its transfer, sale, or other interactions.
Most NFTs are minted as ERC-721 or ERC-1155 tokens on the Ethereum network or equivalent standards on other blockchains, ensuring interoperability across wallets, marketplaces, and applications. This universal recognition empowers your NFT to be bought, sold, or transferred seamlessly within the growing Web3 world.
Step 1: Choose Your Concept and Create Your Digital Asset
Before you start minting, you need a clear concept and a finished digital file. NFTs can represent virtually any form of digital content, including but not limited to:
- Visual Art: Digital paintings, illustrations, photography, generative art, or 3D models
- Music and Audio: Songs, albums, sound effects, or exclusive recordings
- Video Content: Short films, animations, music videos, or memorable moments
- Collectibles: Digital trading cards, memorabilia, or character designs
- Utility NFTs: Membership passes, event tickets, or access tokens
- Gaming Assets: In-game items, characters, skins, or virtual land
Your concept should balance your creative vision with an understanding of the market. Research existing NFT projects in your niche to discover what appeals to collectors. Decide whether your NFT will be a standalone piece or part of a larger collection, as this influences your minting strategy and marketing approach.
Create your digital asset using the appropriate software tools: Adobe Creative Suite for digital art, digital audio workstations (DAWs) for music, Blender for 3D models, or any other tool that produces high-quality digital files. Ensure your final file complies with the technical requirements of your chosen marketplace, which usually accepts formats like:
- Image: PNG, JPEG, GIF, SVG
- Video: MP4, MOV, WEBM
- Audio: MP3, WAV, FLAC
File size limits typically range up to 100MB, though some platforms allow larger files.
Step 2: Select Your Blockchain Network
Choosing the right blockchain network is a critical decision that affects minting costs, marketplace compatibility, and your target audience. Each blockchain offers unique benefits and tradeoffs:
- Ethereum: The most established and widely supported network for NFTs, Ethereum boasts the largest marketplace presence and liquidity. However, minting on Ethereum often involves high gas fees—transaction costs that can reach hundreds of dollars during peak times. Ethereum NFTs use ERC-721 or ERC-1155 standards, ensuring broad compatibility.
- Polygon: A layer-2 solution compatible with Ethereum, Polygon dramatically reduces gas fees to just a few cents or less per transaction. It supports major marketplaces like OpenSea, making it an excellent choice for creators looking to mint NFTs affordably without sacrificing audience reach.
- Solana: Known for its lightning-fast transaction speeds and minimal fees (fractions of a cent), Solana has become popular for gaming NFTs and large-scale projects. Its ecosystem includes marketplaces like Magic Eden and Solanart.
- Tezos: An environmentally friendly, proof-of-stake blockchain with very low fees. Tezos appeals to creators and collectors concerned about sustainability.
Your choice of network determines which wallets and marketplaces you can use, so consider where your potential buyers congregate and what aligns with your project’s values and budget.
Step 3: Set Up Your Cryptocurrency Wallet
To mint NFTs, you need a cryptocurrency wallet that connects to the blockchain network and stores your digital assets. Your wallet acts as your digital identity and bank account within the NFT world. MetaMask is the most widely used wallet for Ethereum and compatible networks. It is available as a browser extension and mobile app, providing a user-friendly interface to manage your crypto and NFTs. Setting up MetaMask involves:
- Downloading the app or extension from metamask.io or official app stores.
- Creating a new wallet and setting a strong password.
- Writing down your 12-24 word seed phrase on paper and storing it securely offline. This phrase is your only way to recover your wallet if you lose access. Never share it or save it digitally.
- Adding additional networks like Polygon or Avalanche through the wallet’s network settings if needed.
Other popular wallets include Coinbase Wallet, Trust Wallet (mobile-first), and Phantom Wallet (for Solana NFTs). Choose a wallet compatible with your chosen blockchain and your preferred user experience.
Step 4: Fund Your Wallet with Cryptocurrency
Minting NFTs requires cryptocurrency to pay network transaction fees, known as gas fees. The amount depends on your blockchain choice:
- Ethereum: Budget between $150 and $300 or more to cover minting and gas fees, which fluctuate with network congestion.
- Polygon: Around $5 to $10 can cover multiple minting transactions due to its low fees.
- Solana: Typically $1 to $5 is sufficient for extensive minting.
You can purchase cryptocurrency on centralized exchanges such as Coinbase, Binance, or Kraken, using bank transfers, credit cards, or debit cards. After buying, withdraw your crypto to your wallet’s public address—a long alphanumeric string visible in your wallet interface. Always double-check the address before sending, since blockchain transactions are irreversible.
For layer-2 networks like Polygon, you might need to bridge tokens from Ethereum mainnet. Many wallets and marketplaces include built-in bridging tools to simplify this step.
Step 5: Choose Your NFT Marketplace
NFT marketplaces provide the platform to mint, showcase, sell, and trade your digital assets. Each marketplace has its own audience, fee structure, and supported blockchains:
- OpenSea: The largest NFT marketplace supporting Ethereum, Polygon, Arbitrum, Optimism, Avalanche, and Base. Supports lazy minting, allowing NFTs to be minted without upfront gas fees, paid upon first sale. Platform fee: 2.5% of sales.
- Rarible: A decentralized, community-driven platform offering multi-chain support and token rewards (RARI). It emphasizes creator empowerment and charges a 2.5% fee on transactions.
- Foundation: Curated marketplace focusing on high-quality digital art. Charges a 5% platform fee.
- SuperRare: For exclusive, single-edition digital art, with a 3% primary sale fee and 15% secondary sale fee. It offers a high-end collector experience.
- Coinbase NFT: Integrated with Coinbase Wallet and exchange, ideal for users in the Coinbase ecosystem.
- Solanart and Magic Eden: Leading Solana-based marketplaces with low fees and a growing user base.
Select a marketplace that aligns with your blockchain choice, target audience, and project objectives.
Step 6: The Minting Process Step-by-Step
Using OpenSea as an example, the minting steps are as follows:
- Connect Your Wallet: Visit the marketplace and click “Connect Wallet.” Select your wallet type (e.g., MetaMask) and approve the connection.
- Create a Collection: Organize your NFTs by creating a collection. Enter its name, description, banner, and logo. Set royalty percentages (typically 5-10%).
- Start Minting: Click “Create” or “Mint NFT.”
- Upload Your Digital File: Drag and drop your file. The platform uploads it to decentralized storage like IPFS.
- Configure Metadata: Name your NFT, write a compelling description, add properties, and set supply.
- Sales Method: Choose between fixed price, auction, or open bids.
- Sign and Mint: Approve the transaction in your wallet. On some platforms, lazy minting is possible, which defers gas fees until sale.
- List for Sale: After minting, set your sale price and approve listing.
Understanding and Managing Gas Fees
Gas fees are payments made to blockchain validators to process transactions. Fees vary based on network demand and complexity. During high congestion, Ethereum fees can spike dramatically. To manage costs:
- Time Transactions: Mint during off-peak hours using tools like ETH Gas Station to monitor real-time fees.
- Lazy Minting: Platforms like OpenSea allow gasless minting, shifting costs to buyers.
- Use Cost-Effective Networks: Networks like Polygon, Solana, and Tezos offer minimal fees.
- Batch Minting: Mint multiple NFTs simultaneously to reduce per-item costs.
Post-Minting Strategies: Marketing and Community Building
Minting your NFT is just the beginning; promotion is key to attracting interest and building value. Consider:
- Community Engagement: Build a community on Discord, Twitter, or other platforms. Share your creative process and teasers.
- Social Media Promotion: Use Twitter (X) to showcase high-quality images, stories, and interact with the community. Use relevant hashtags.
- Create Scarcity: Limited editions and timed drops generate urgency.
- Ongoing Engagement: Offer exclusive content, holder benefits, and regular updates to maintain interest.
The Role of Analytics in NFT Success
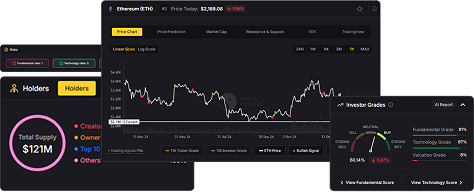
Market intelligence tools like Token Metrics provide AI-powered analytics. They help creators understand market trends, best timing for minting and selling, and collector behavior. Such insights can assist in managing and maximizing digital assets in a competitive landscape.
Common Pitfalls and How to Avoid Them
- Underestimating Costs: Account for all fees and budget extra for volatility.
- Legal Issues: Clarify copyright and licensing rights when minting.
- Community Neglect: Engage and build your audience for sustained interest.
- Poor Presentation: Use high-quality images, clear descriptions, and storytelling.
- Expecting Instant Success: Patience and consistent effort are essential.
The Future of NFT Minting
Advancements like gasless minting, layer-2 scaling, and cross-chain interoperability are shaping the future. NFTs are expanding into gaming, virtual real estate, event tickets, memberships, and real-world assets, opening many new opportunities.
Taking the First Step
While minting your first NFT might seem complex, the process is manageable with proper guidance. Start with small, low-cost projects on platforms like Polygon to learn and build your experience. Authenticity and persistence are key in this evolving space. The tools and communities are ready for creators like you to participate and innovate.
The question isn’t just how can I mint my own NFT—you absolutely can. The real question is: what will you create?
AI Agents in Minutes, Not Months

%201.svg)

.png)


.svg)
No Credit Card Required


Online Payment


SSL Encrypted
.png)
Token Metrics Media LLC is a regular publication of information, analysis, and commentary focused especially on blockchain technology and business, cryptocurrency, blockchain-based tokens, market trends, and trading strategies.
Token Metrics Media LLC does not provide individually tailored investment advice and does not take a subscriber’s or anyone’s personal circumstances into consideration when discussing investments; nor is Token Metrics Advisers LLC registered as an investment adviser or broker-dealer in any jurisdiction.
Information contained herein is not an offer or solicitation to buy, hold, or sell any security. The Token Metrics team has advised and invested in many blockchain companies. A complete list of their advisory roles and current holdings can be viewed here: https://tokenmetrics.com/disclosures.html/
Token Metrics Media LLC relies on information from various sources believed to be reliable, including clients and third parties, but cannot guarantee the accuracy and completeness of that information. Additionally, Token Metrics Media LLC does not provide tax advice, and investors are encouraged to consult with their personal tax advisors.
All investing involves risk, including the possible loss of money you invest, and past performance does not guarantee future performance. Ratings and price predictions are provided for informational and illustrative purposes, and may not reflect actual future performance.